Monday, May 6, 2013

Doll Craft #9 - May Flowers!

April showers bring May flowers. Unfortunately, the showers aren't much fun, because your doll can't enjoy the BEAUTIFUL outdoors. And then when the flowers come, if your doll allergic to pollen like mine, you can go outside anyway :( Well problem solved! Now your doll can enjoy flowers without being super uncomfortable, AND have a neat school pen in the process! Here's how!

 Before you begin, you will need some supplies:
  • A mini pen (found at dollar or party stores)
  • Colored duct tape 
  • Scissors (not shown)
Let's get started!
 If your mini pen has a cap, remove it.
 Next, roll out the duct tape to about 6 inches as shown above.
 Place your pen on the edge and roll slowly upwards, keeping the duct tape as smooth as possible.
 Cool! Your pen should look like this (above):
 Next, cut a small square of duct tape, only about one inch or so across.
 Fold down the top corners like you would to make a paper airplane ;)
 Attach the still-sticky part to the back of your pen, like this.
 Make another one, the same exact size. Stick it to the pen like as shown above.
 Repeat until you have about five layers of "petals". Make sure not to do to many petals, as the pen will become top heavy.
 And here is your May flower! Enjoy!

 Madi <3


Sunday, April 28, 2013

Doll Craft #8 - Mini Doll Scarf!

Ah Spring... unpredictable spring. 90 degrees one day and 40 the next. But are all of you petite customers waiting for the chance to be ready and fashionable for all types of weather? Well, the wait's over! Here's how to make your own pom-pom scarf!


Before you begin, you will need some supplies:
  • A mini doll
  • Thread (preferably white)
  • Needle
  • Needle Threader (optional)
  • Scissors
  • Mini pom-poms
Let's get started!

First, you will need to measure the thread loosely around your mini's neck. Double it.

Thread your needle. To use a needle threader: Thread the wire through the eye of your needle. Put the thread through the loop in the wire. Pull the needle down off of the loop.

Double the thread and tie a knot (as shown).

Now comes the fun part! Take a mini pom-pom of your choice and thread the needle through it. Pull the pom-pom all the way down until it reaches the knot that you made on the bottom.

It should look like the picture above.

Repeat threading pom-poms down the thread until you have only about a half inch left. Cut off the needle and tie in a knot.

Put the to - be scarf around your mini's neck and tie the two ends together loosely so that you can take it off again when you want.


 Our cover model Kirstin decided to model the scarf :)


Enjoy!

Call me Madi from now on :)


Ps. I am sorry that I didn't post anything for Show and Tell Saturday yesterday, but we didn't receive any pictures.

Pps (or is it pss? The world may never know). Did you see the white background that I am using for my pics to make them look more professional? I will share my secret soon! Stay tuned :)


Friday, April 26, 2013

Doll Craft #7 - Celebrate Earth Day Every Day! (With a little help from your dolls)

Hi girls! Sadly, Earth Week is ending tomorrow, but that doesn't mean that you have to stop caring for the Earth and being good stewards of God's creation (yes, I am a Christian). Let your dolls do their part for the environment by making them a place to grow their plants in! Let's get started!

 Before you begin, you will need some supplies (sorry for being sideways):
  • Small egg carton (or a large one cut in half)
  • Green paint
  • Sponge brush
  • Foam letters or other decorations
  • Scissors
  • Newspaper
Before you begin, I would suggest putting newspaper down as this is a VERY messy project. 
 Get out your egg carton and cut off the top as shown below. DO NOT THROW THIS OUT!!! We will be using it later on in the project.
 Cut off the little tab thingy (lol) that I am pointing to. You may throw this away or recycle if it is recyclable.
 Great! Now, your egg carton should look like this.
 Now we get to use the part that I asked you to save earlier. Pour your green paint into it instead of using a paper plate. You will not need to much.
 Turn over your egg carton and use your sponge brush to dab on the paint, covering as much white space as possible. I wouldn't suggest brushing, because you won't get the same textured "grassy" feel.
 When you are done, it should look like this. Let it dry about half way before turning over.
 Great! Now add your decorations! My foam letters spell out "Go Green".
 And here is what your finished project should look like. Let it dry overnight. Now your doll can plant small flowers in the holder. Make sure to tell her about the proper care of a plant! Or, you could even conduct a science class and this could be their experiment! Want class ideas? E-mail us at 1milliondollies@gmail.com and I will post some! Good luck on your new garden!

Ps. Tomorrow is Show and Tell Saturday. Email us your pics of your dolls using our crafts at 1milliondollies@gmail.com and we will post them!

Tuesday, April 23, 2013

Contact Us!

As One Million Dollies seems fairly successful so far, we have agreed to add a few special features :)

1. Tell Us Tuesday. Tell us what craft you want us to do. Please include directions and every Tuesday we will randomly select a craft to post. Email us at 1milliondollies@gmail.com with your ideas.

2. Show and Tell Saturday. Email us your pics of the crafts we did here at 1milliondollies@gmail.com and we will post them every Saturday! Please include you/your doll's name and what craft you did with the pic.

3. Craft of the Month. On the first of every month we will ask you to vote on which craft should be the featured craft of the month. Then, you can submit reviews and pics!

We hope that you have fun with these new features!

Ps. I am sorry for not posting lately :( I will be posting a fun Earth Day craft soon :p

Friday, April 19, 2013

Doll Craft #6 - Make your Doll Some Lemonade!

Hey Girlies! I don't know about you, but things are starting to get pretty warm - for both me and my dollies. Kit has especially been complaining about not having something cool to drink. I was getting tired of the whining, and finally gave in! Now YOU can stop the complaining of your doll too and make her a nice cold glass of lemonade!

This craft can be kind of messy if you aren't careful, so I would suggest putting down some old magazines or newspapers first. You will need:
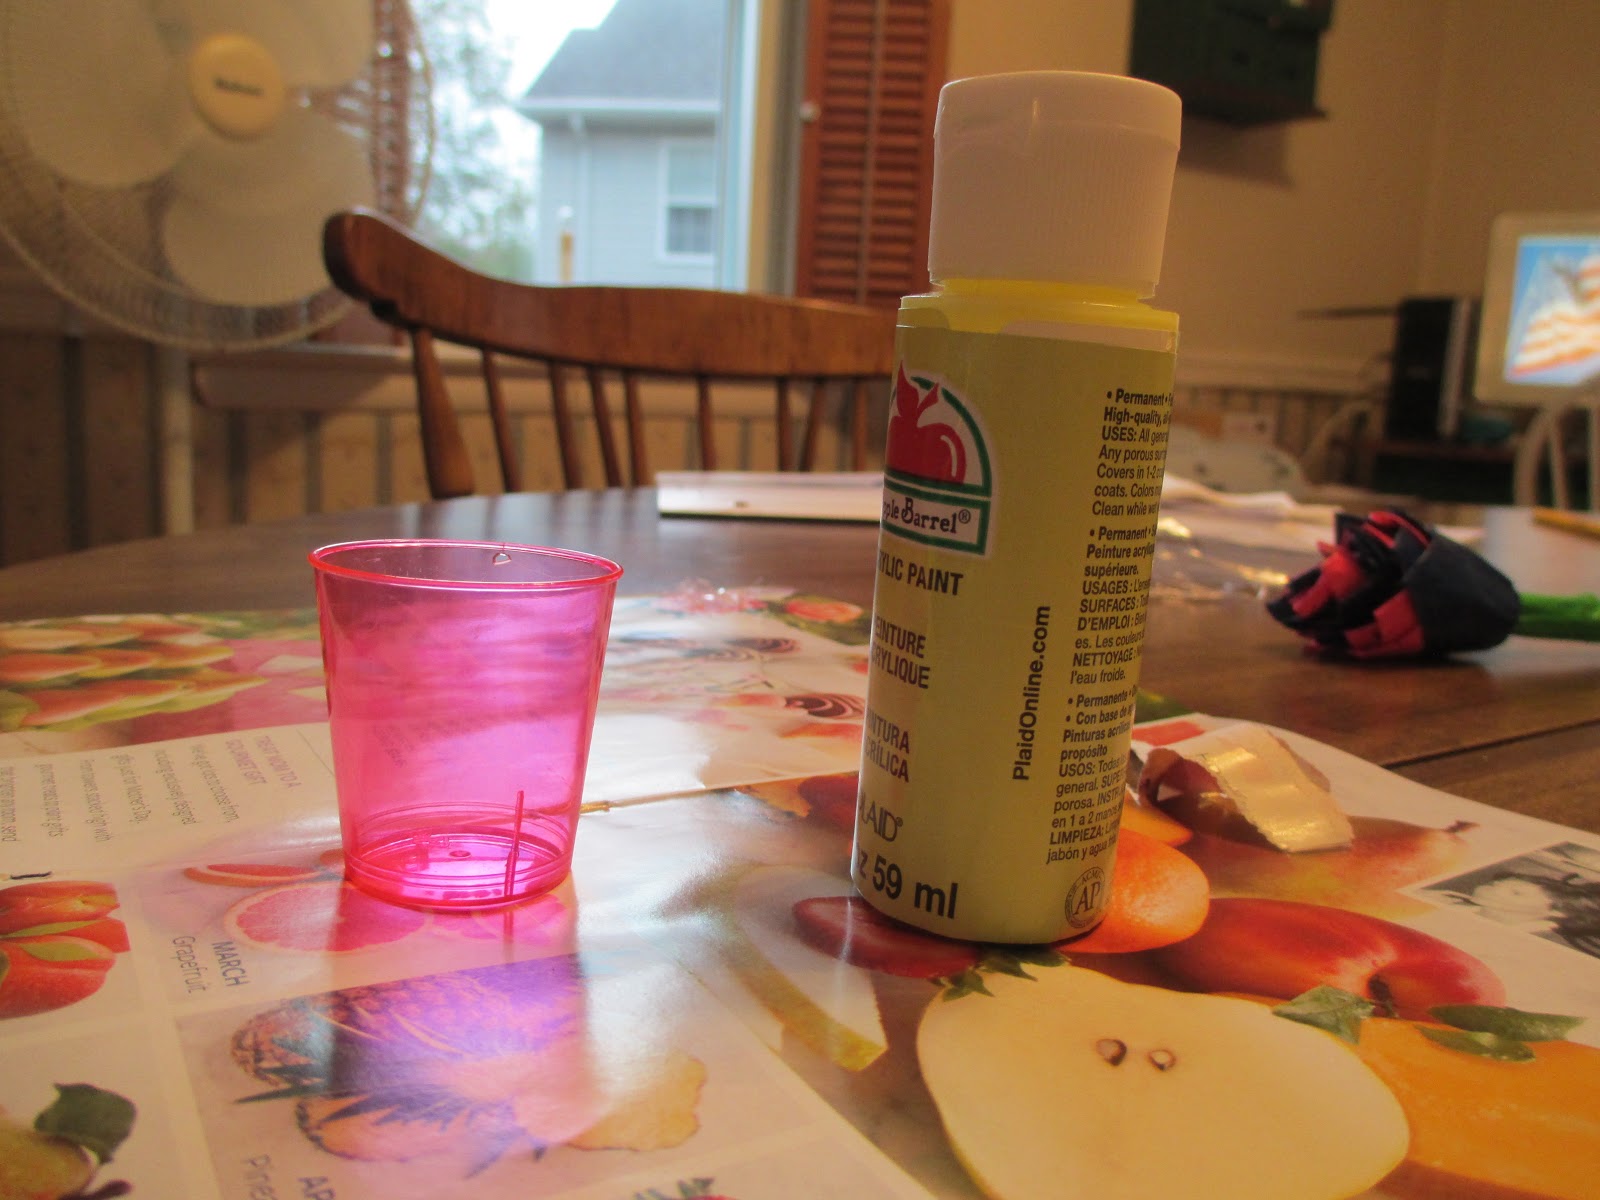
  • Yellow acrylic or washable paint (a lot)
  • Yellow craft foam
  • Clear plastic baggie or about 5 clear beads
  • Straw
  • Small plastic cup OR cap
  • Pen
  • Scissors

If you are using the clear beads, you can skip this step! Otherwise... take your clear plastic baggie and rip off a small piece.

Crumple it up, as seen in the pic above. Repeat this about seven or eight more times. Then, set aside.

Now it is time for your paint!

Fill up the cup to about here.

Great! Now add in the "ice" If you are using the baggie, make sure to save some and add them in while the paint is drying, just in case these sink :(

Next, take your straw and measure it against the cup. When you cut it, it should be slightly taller than the cup.

Place the straw in at an angle. Try not to push any ice cubes down into the bottom!

Finally, trace the tip of your thumb onto the piece of craft foam. Cut it about halfway up the middle.

Slide the opening onto the rim of the cup for the lemon and you are done! Just let it dry COMPLETELY before serving your doll :) I assure you, Kit is now satisfied with her drink, and I hope that your doll is too! Enjoy! 


Doll Craft #5 Make Your Dolls a Basket!

So, I know that I already showed how to make a shopping bag, but I thought that I would show how to make a basket too! The shopping bag is for modern times, but the basket can be for playing Little House on the Prairie or another olden time thing! Here goes!
Things Needed:
Cupcake Muffin Liner
Tape or Glue Stick (no liquid glue!)
Ribbon or string
Crafting Level: Easy
Start with your Cupcake/muffin liners! They can be any color, any pattern, and any brand! As you can see, i used white!
Next, glue or tape (remember, no liquid glue!) a ribbon to both ends of the liner!
Here is how it should look in the end! It can be used for an Easter basket, a basket to pick flowers in, or just a basket to carry things!


Thursday, April 18, 2013

Doll craft #4 Craft Idea

Do you or your parents have a sewing machine? If so, then you can create your VERY OWN AG doll clothes!

First, go to your local JoAnn's or fabric store and look for some simple 18" doll clothes patterns:


You will also need a sewing machine and some fabrics. As you can see, I have a blue Kenmore.

 This is the pattern that I chose. I needed about five eights yard of fabric. (Sorry for it being sideways)
Finally, the finished product! I put it on Lissy :)
So the next time that you have a free day full of nothing so do, try sewing your dolls some clothes! Its and inexpensive way to spend your Saturday! Enjoy!